Minari Lighting Process
- Serena Yoon
- Feb 25, 2023
- 4 min read
Updated: Nov 8, 2023
Night Lighting Plan
I will make proceed with Lighting based on reality and physics.
I will create an Environment Lighting Set.
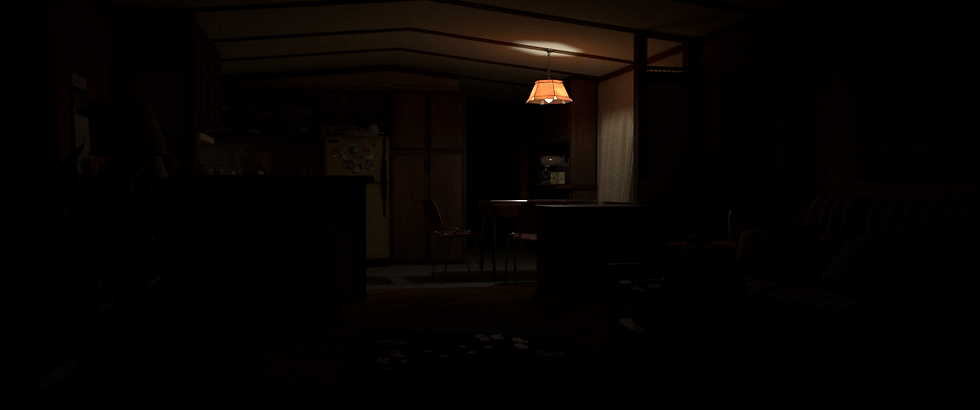
I will make the interior Lighting. I observed the Movie Scene, and I found at least 8 Lights in the Scene.
After reproducing the Real lighting in the movie, I plan to add insufficient lighting.
I will add the TV Animation Lighting with Self-illumination.
I will add some Fogs.
I will help the physical camera function to control the lack of light technology.
Render Pass
Nuke Composite
Environment Lighting
VRay Geo Sun & Sky + VRay Dome Light
I used the VRay Geo Sun & Sky and VRay Dome Light. VRay Geo Sun & Sky can help make the Real Sky time and the Time-lapse. It will reproduce the actual exterior colors and lights of my scene. And the reason why I added dome light is that dome light has a function called Dome Adaptive. This helps with GI calculations to help reduce noise. Interior Scene can make noise easily, so I choose this way.

Summer, Night

Date: 8/18 - Summer
Hour Value: 21.000 - 9 pm

Use VRaySun&Sky Tex as HDRI of Dome light at the same time.
Interior Lighting


I found that there were at least eight lights in a scene. I will create my set based on this. I will install the light based on the color temperature.
Lighting Breakdown
1. Lighting Start! Add the Shape Light as the Key light.
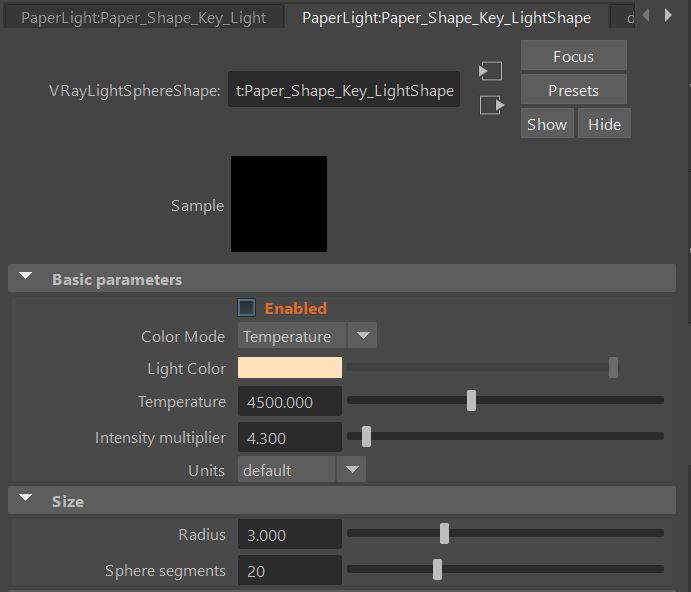
The shadow of the Scenes looks soft light. I prefer to use the VRayShapeLight instead of Point Light. This is because Point Light makes a sharper shadow than Shape Light.

2. Add the Fill Lights

I added fil lights to fill in the lack of diffuse with the key light. I turned off Affect Specular and Affect Reflections in the light's Options, so only the light's diffuse affects the scene.
3. Add the Bounce Lights
Dining Light and Lamp's Bounce Lights make orange lights on the ceiling and walls. Dining Light makes a reflection on the kitchen drawer. Paper Flower Light affects the Dial Phone, Sofa, and Curtain. I observed the reference.

4. Add the bulb modeling to Dining Light.
I used Self-illumination and Sphere light for a bulb. There is another way to light the bulb with mesh light, but Mesh Light can make anti-aliasing, noise, and long render time in interior scenes. Therefore, I choose the self-illumination way. Add a self-illumination material to the bulb, and set the Sphere light slightly larger than the bulb. Check the invisible in Sphere light option tap to make only the object invisible while maintaining the value of light.


5. TV Lighting Breakdown
1) Prepared the TV Modeling. The TV Screen will show the Video, so I made the UV Map of the TV Screen Object.


2) I made the TV Video Texture Sequence match the UV Size. This Sequence will be used for Self-illumination Map and Lighting Map.

3) Put the sequence on TV Screen's Self-Illumination Map. Just put the tv_texture.0001 file, and Click the Use Image Sequence.


Result!

4) Make the Rect Light. Put the Rect Light between the glass and the screen because the actual light comes from the panel. I matched the Rect Light Size to the Screen Size.

5) TV panel image and TV light are related. We can use the texture map in VRay Rect Light. Turn on the Use Rect Tex. But We don't need to upload the Sequence File again. If we upload the same file twice, It will make your Maya scene file size big. Go to the texture menu in Hypershade, and drag the TV sequence to Rect Light Tex.

6) Result!
Scene4)

6. Add Mirror
We check the invisible in Options to hide the light shape. But In the Mirror, We can still see the light. We can hide the light in the mirror when we don't check the Affect Specular and Affect Reflections.


7. IES Light


8. Add Fog (Example: Fog Dining Light)
Fog is extracted separately using the render layer. There are three reasons for separately extracting Fog. First, it can break the balance of the existing captured light. Second, unnecessary light rays come out. Third, it isn't easy to control the ray of each light separately. So, after giving each layer separately for each fog, composite them later. I will show Fog of Dining Light as an example.
1) First, I duplicated the master Layer.

2) Turn off the other lights with overrides.

In the attribute window of each light, right-click Enabled and select create layer overrides—Uncheck Enabled of other lights except for the light to be used for fog. Using the Overrides feature, settings are changed only in the current render layer and do not affect other render layers.
3)
VRay - Overrides - Volumetrics - Check Use environment volume - VRay Environment Fog select in the Environment volume


4)
Use the Distance Tool(Create - Measure Tools - Distance Tool) to get the Distance and Height values. The standard is the center of the Camera Lens. Measure the distance of the farthest part from the center of the camera lens in the top view.
Measure the height of the room in Side View.


Fog Distance - 1300(measured distance value) -> 600
Fog Height - 250(measured height value)
We can create the density by adjusting the fog distance values and height. As the distance increases, the fog density decreases, and the light becomes brighter. As the distance decreases, the fog density increases, and the light becomes darker. Density occurs as a distance value, so this is a physical adjustment. I wanted to get the high-density fog, so I decreased the distance.
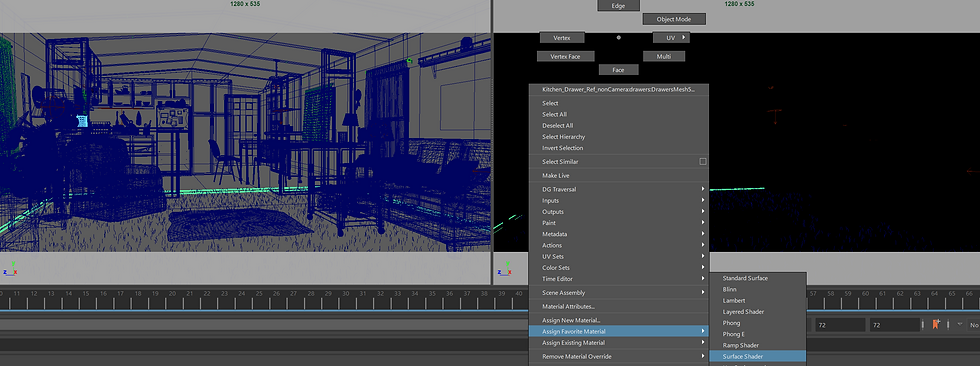
5) Assign the Surface Shader to all models. We don't need the GI for Lay. We turn off the GI in Render Settings to reduce the render time.


6) Render!

7) Composite!


Comments